At EXCELSIOR, we think that bikes can use a bit of that style, too. That's why we have a simple guide to knotting a Macramé garland for bike baskets.
Instructions for the Macramé garland
You need the following material:
- Makramé thread 3 mm
- Scissor
- Tape measure
- Fine comb
Step 1: Cut the Macramé threads
First, you have to cut a thread of about 1.5 meters, for hanging the garland. The pennants will later be tied to this thread.
You also need 8 yarn strands of 80 cm for each pennant. Since we are going to make 5 pennants for this garland, you will need to cut 40 strands.
Step 2: Tie the Macramé anchor knot
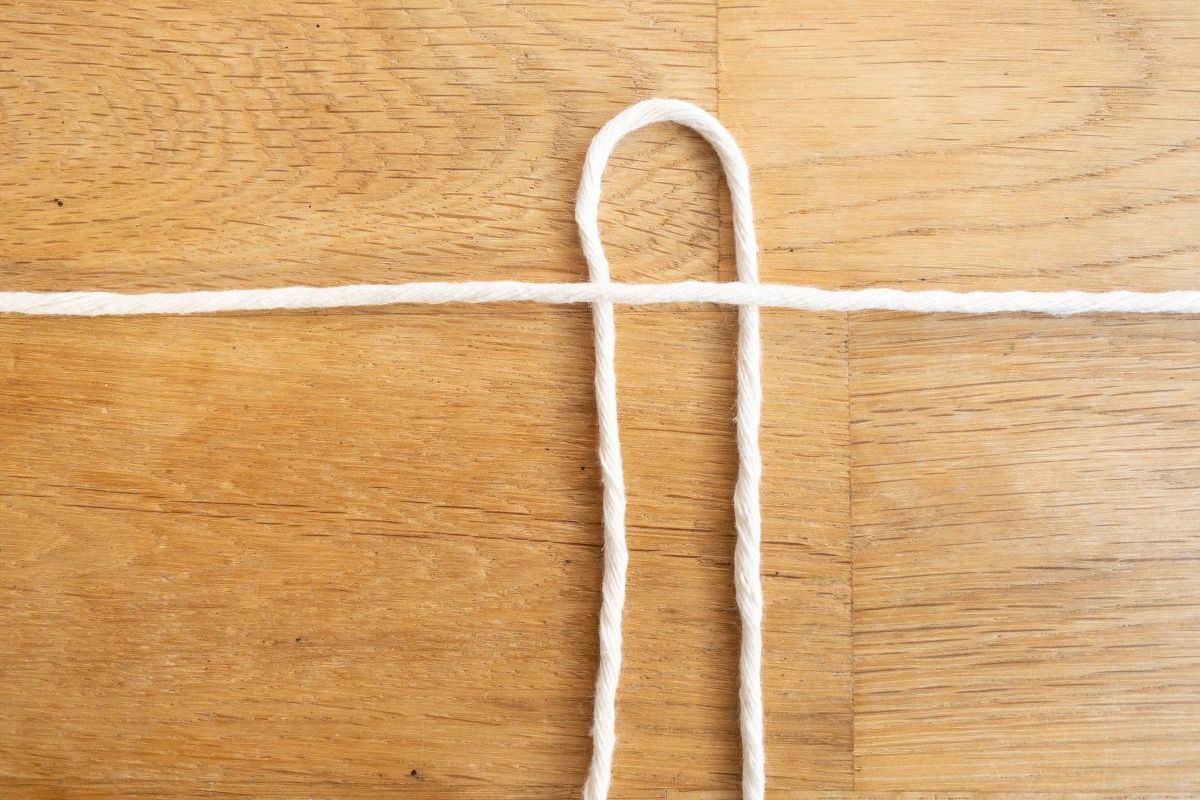
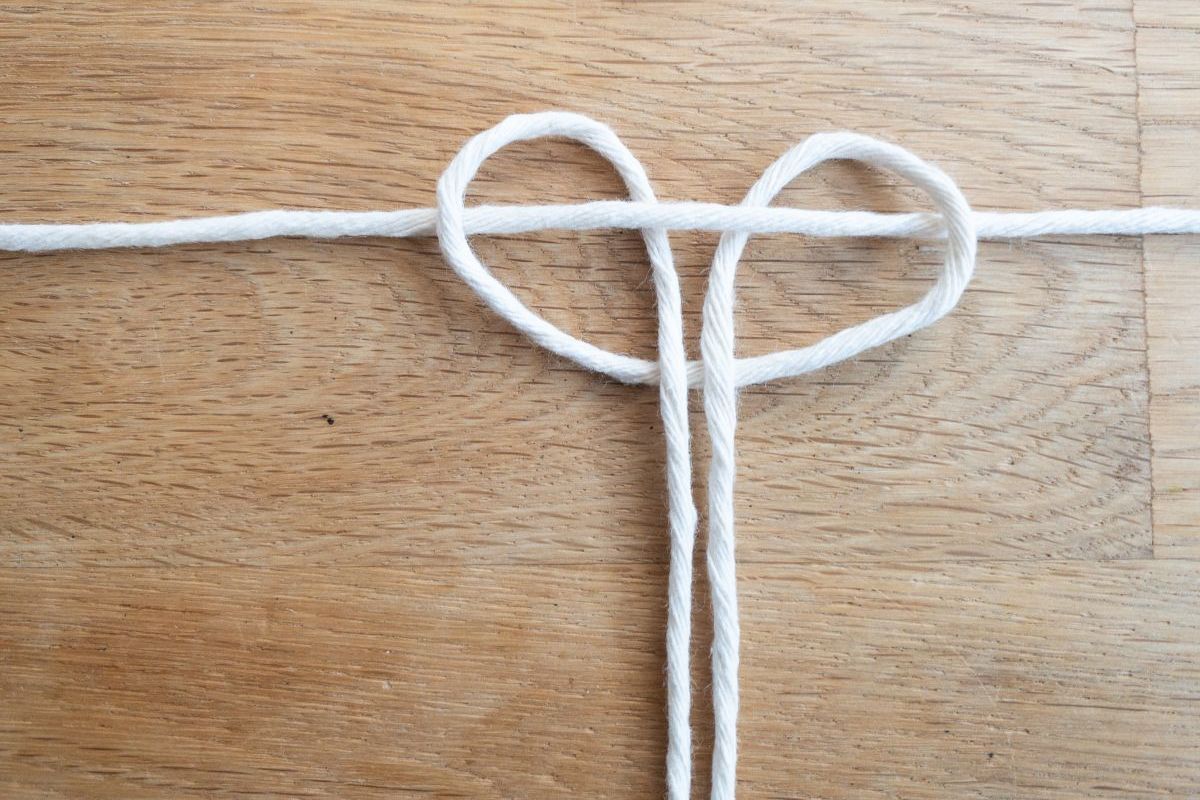
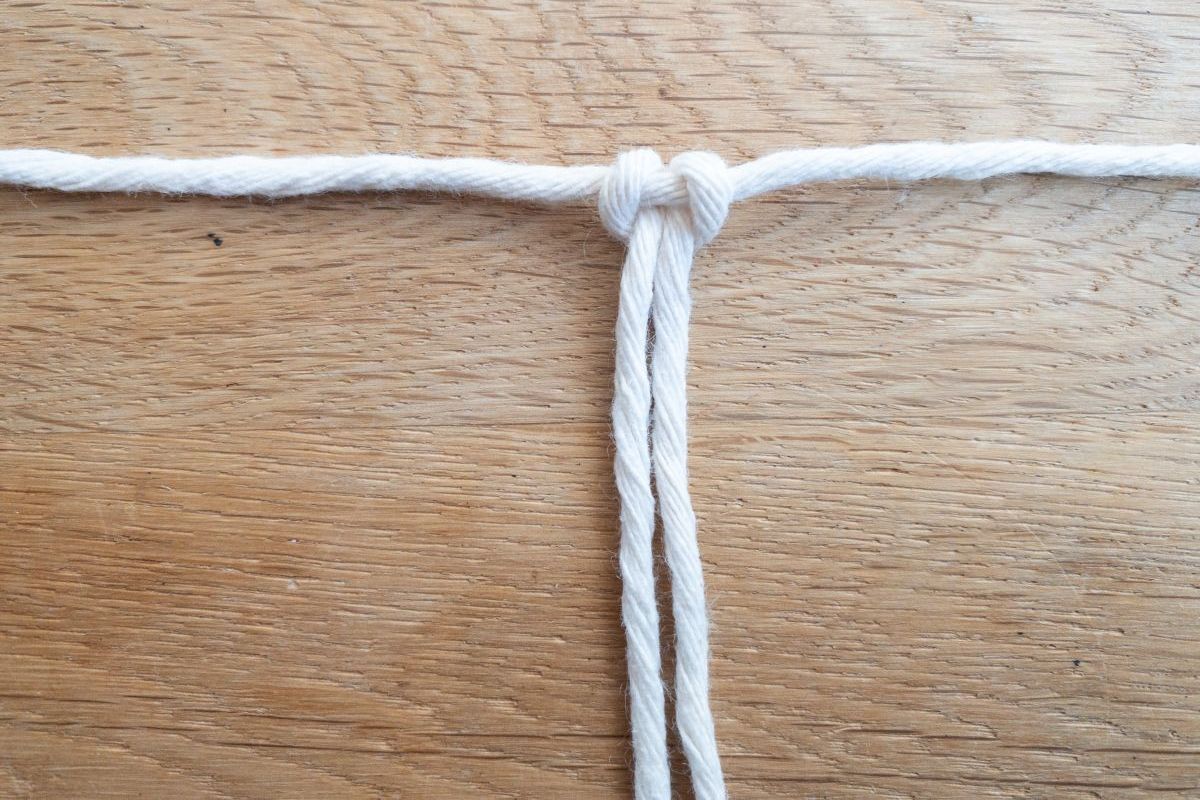
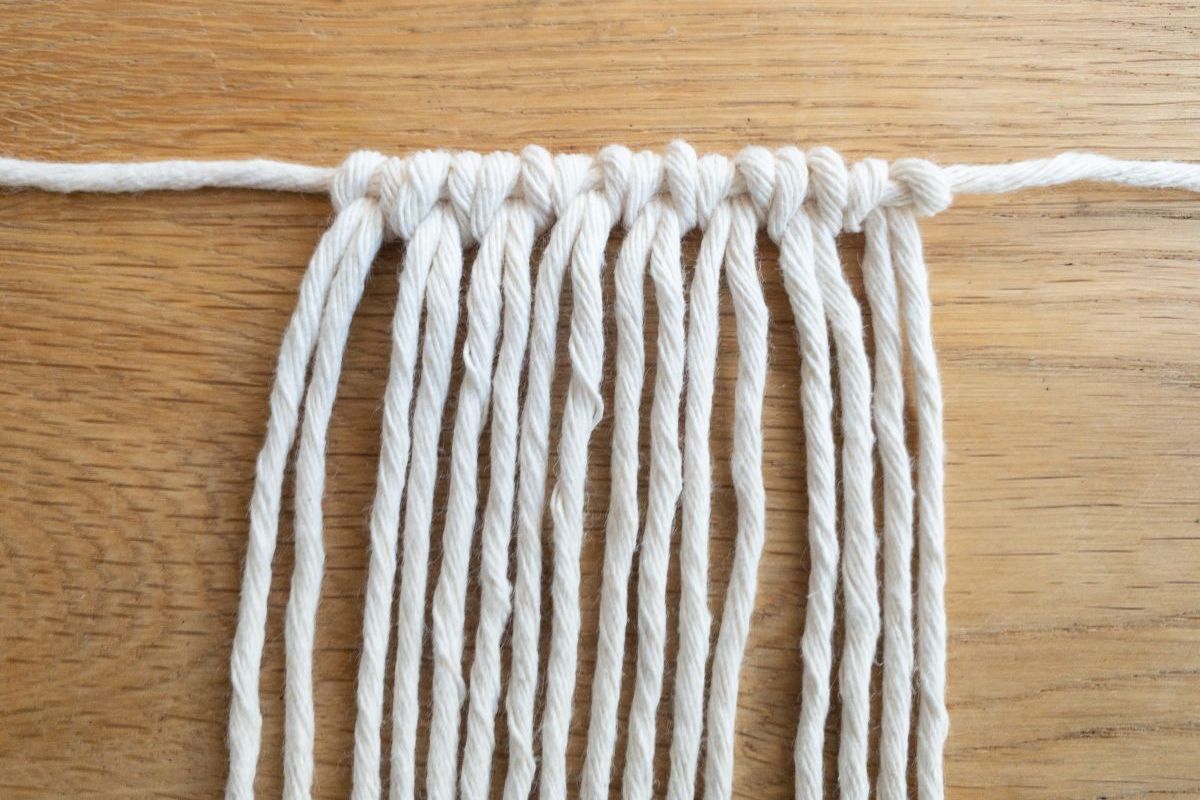
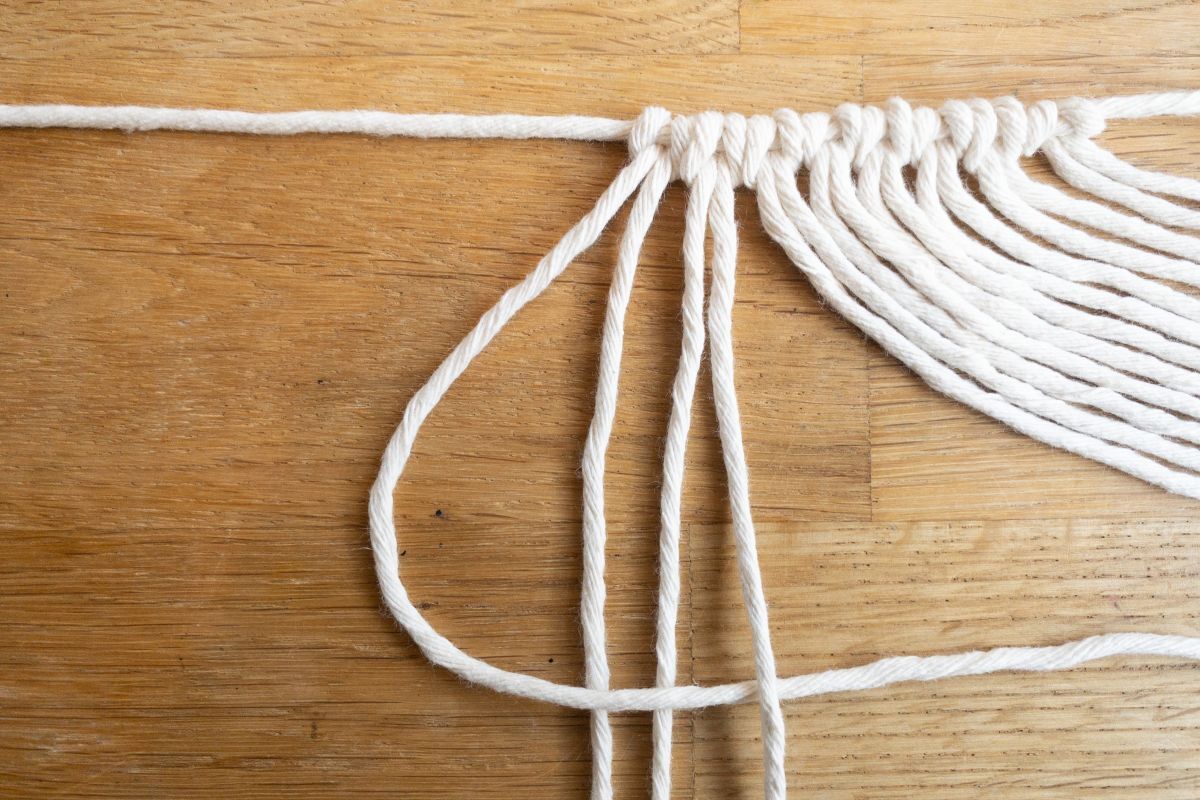
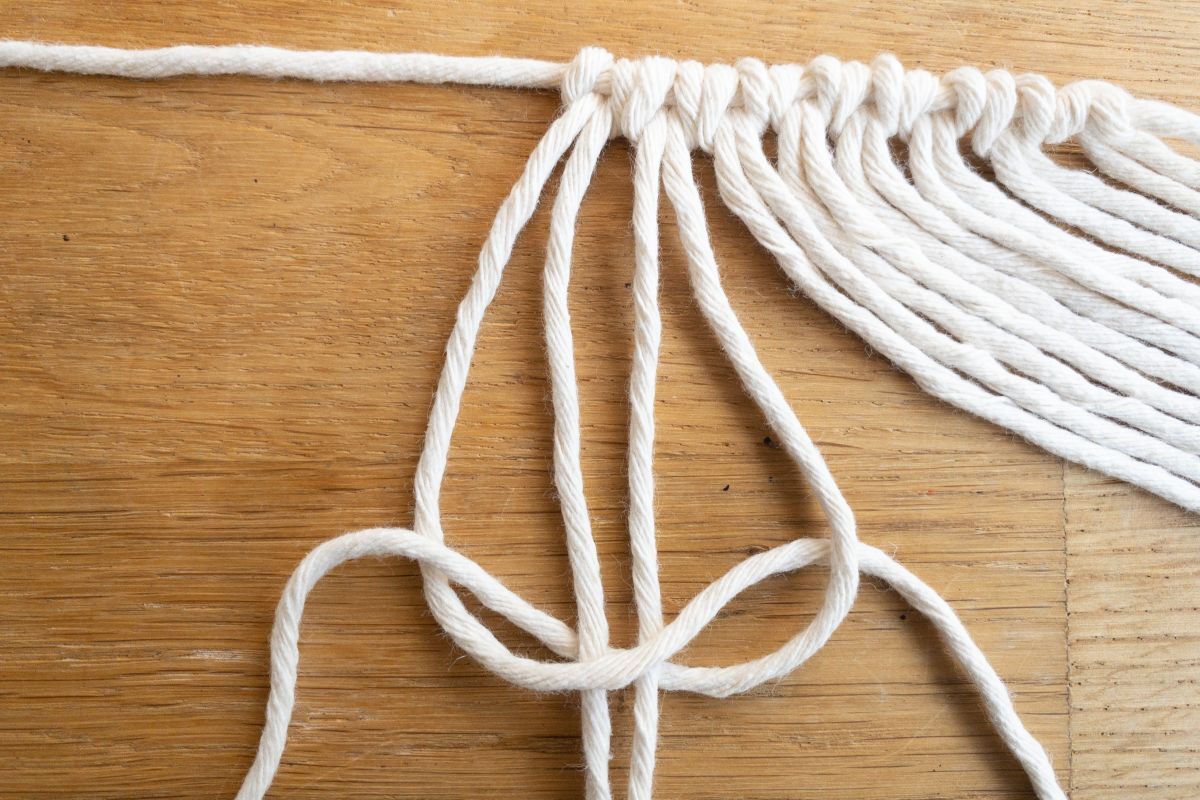
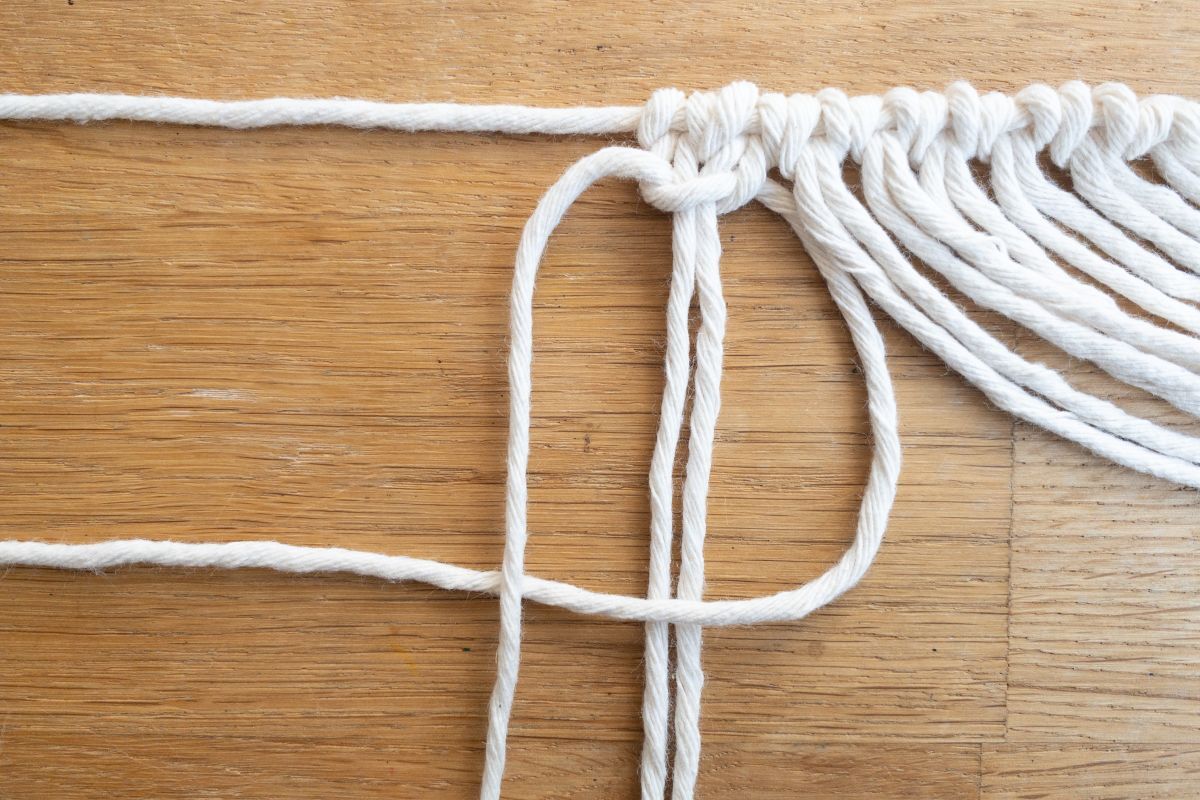
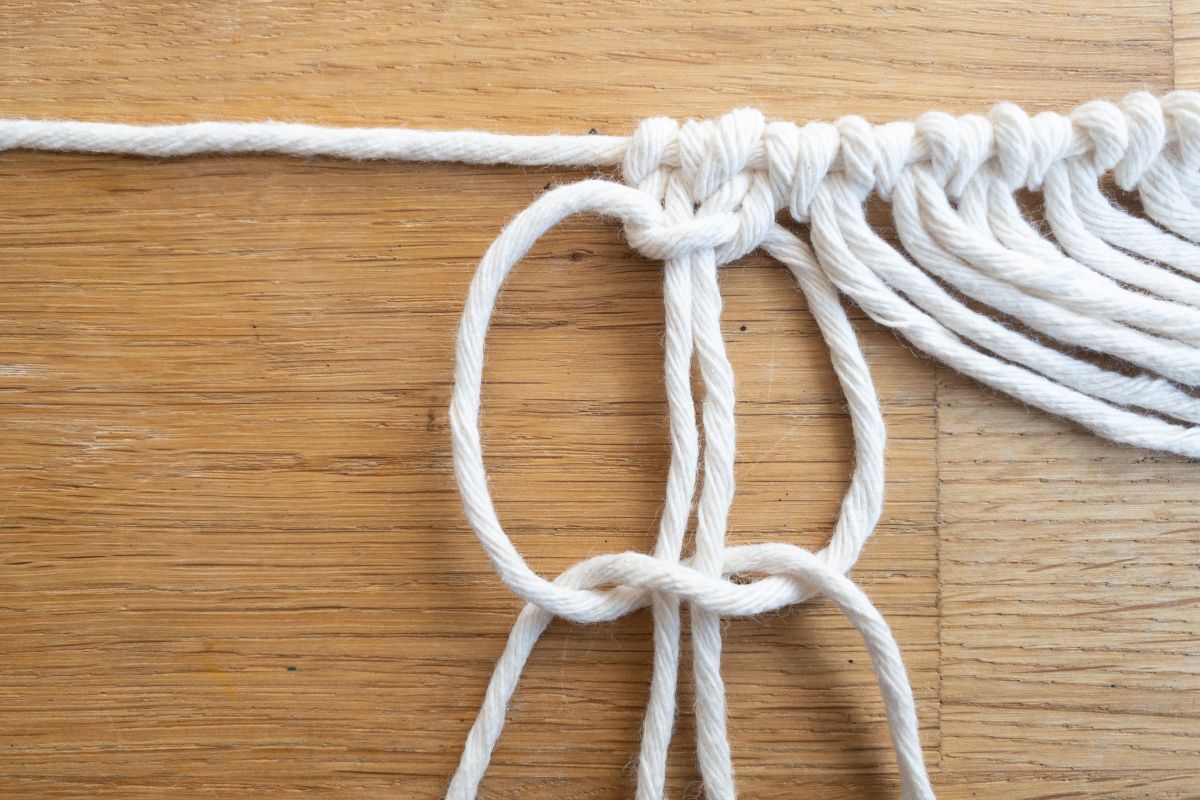
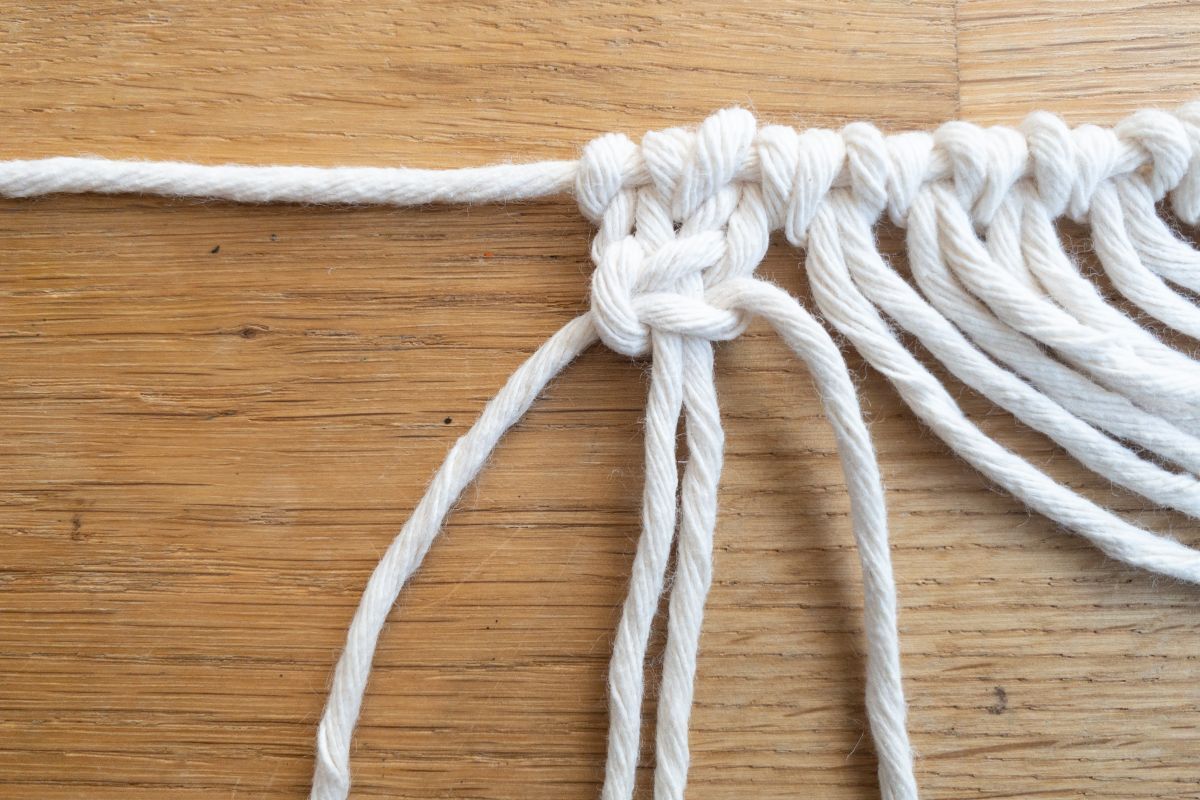
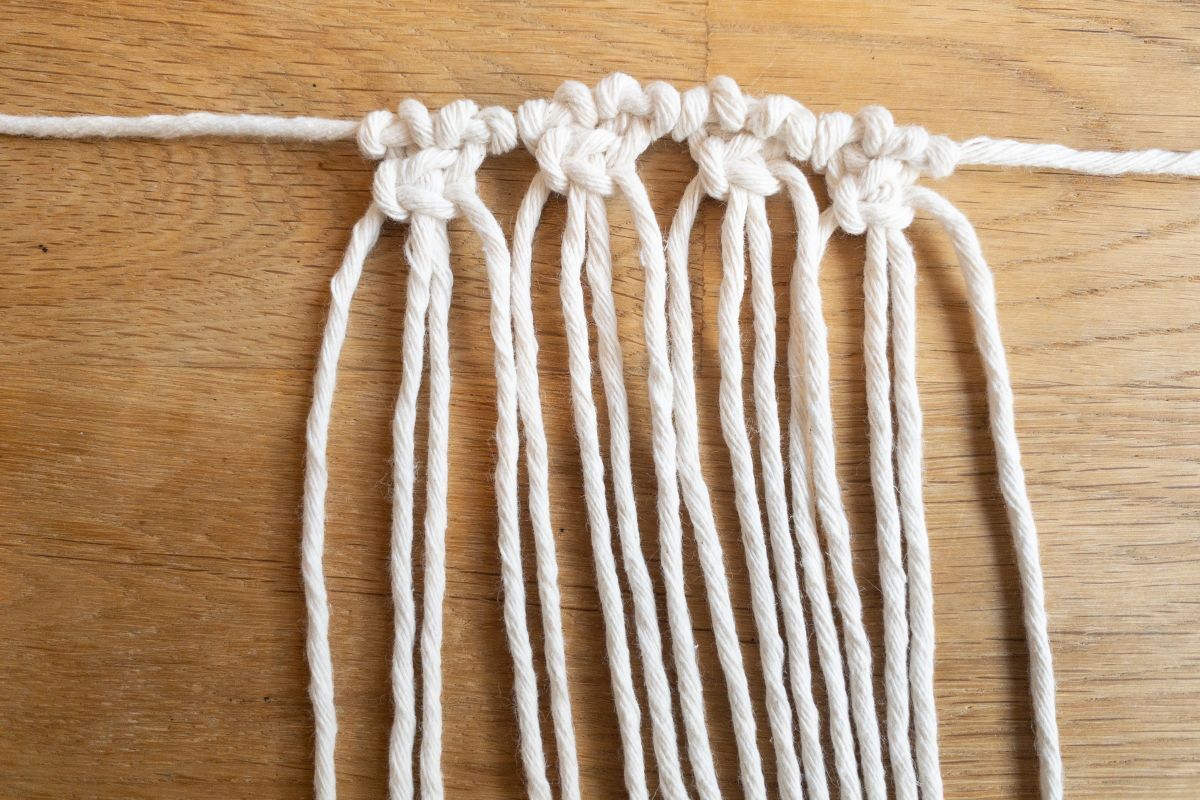
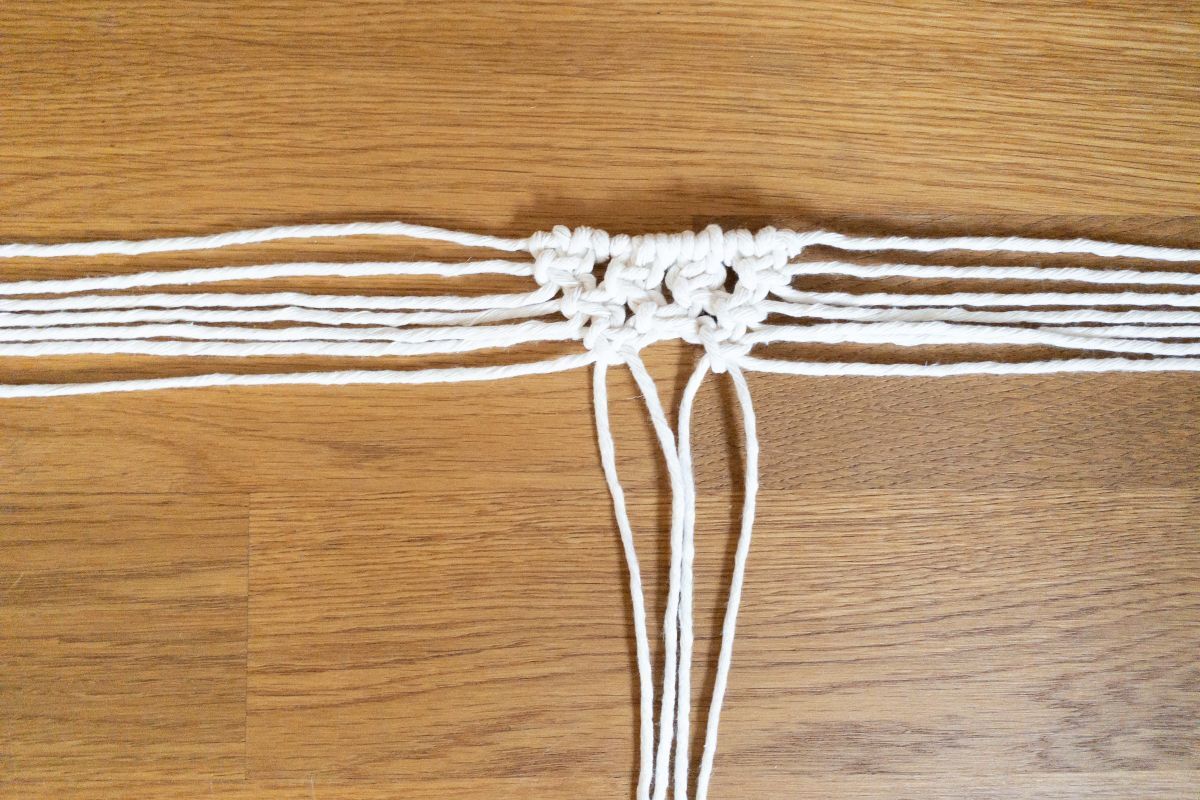
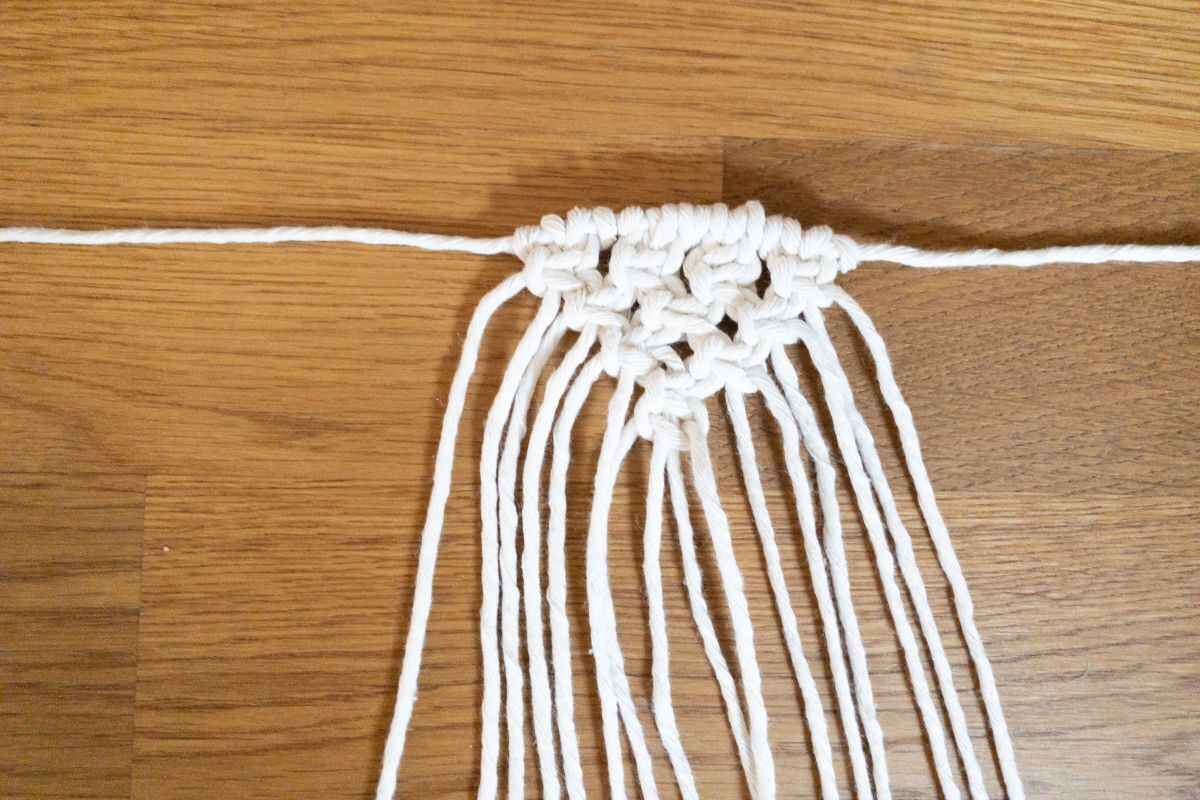
For the first pennant of the garland, start with the Macramé anchor knot. With it, you can tie the eight strands to the long thread. In order to do this, you have to grab one strand twice and place it as a loop under the long thread (Image 1). Now, the two threads of the strand are pulled through (Image 2) and finally pulled tight (Image 3). You have to repeat this with each strand - i.e. eight times - so that in the end 16 threads are hanging from the long thread (Image 4).
Step 3: Tie a Macramé square knot
Now let’s turn our attention to the Macramé square knot. Take the first four threads and pass the left thread over the middle two threads, to the right under the right thread (Image 5). Then, the right thread must be passed under the two middle ones to the left and through the loop that is now on the left (Image 6). Now, slowly tighten the two outer threads upwards.
The whole thing must now be carried out again with the same threads, more or less mirror-inverted. So take the right thread, put it over the two middle threads to the left under the left thread (Image 7). The left thread is passed under the middle ones to the right and through the loop formed on the right (Image 8).
The outer threads are tightened again, and you have your first finished square knot (Image 9). Repeat this process three more times with the next four threads, so that you end up with four square knots in this row (Image 10).
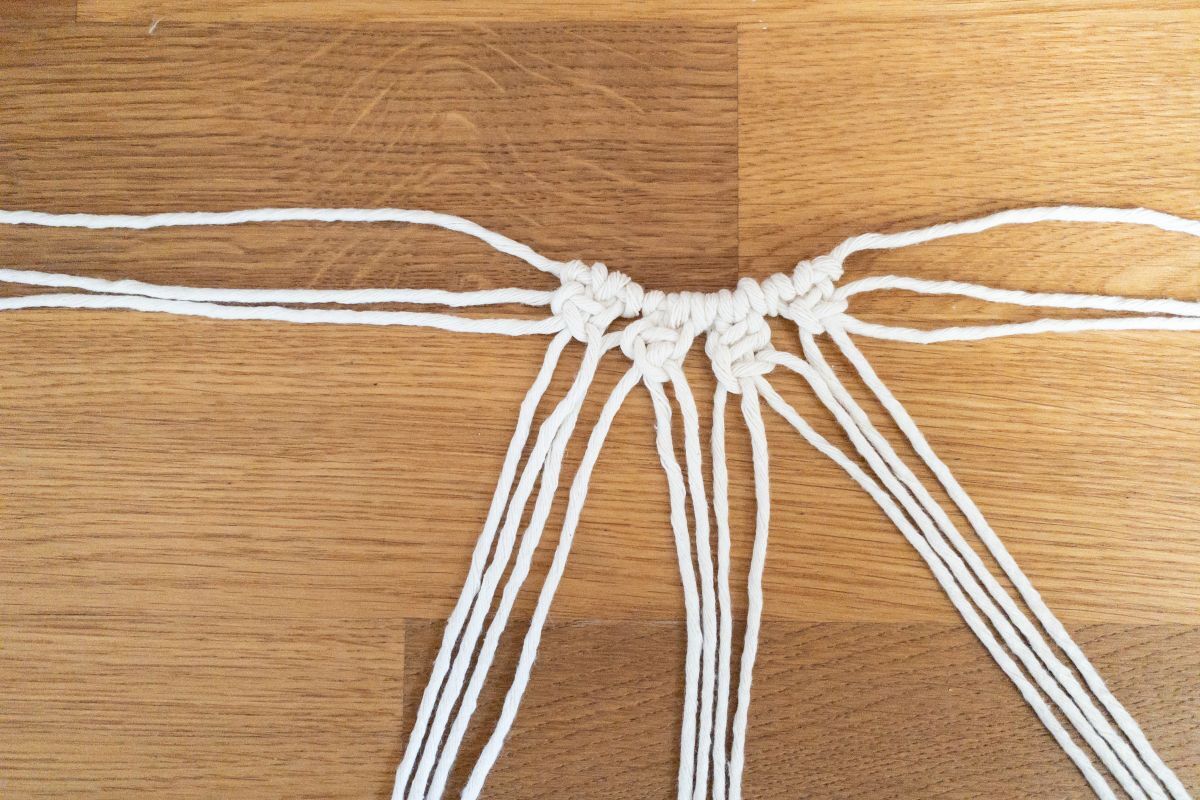
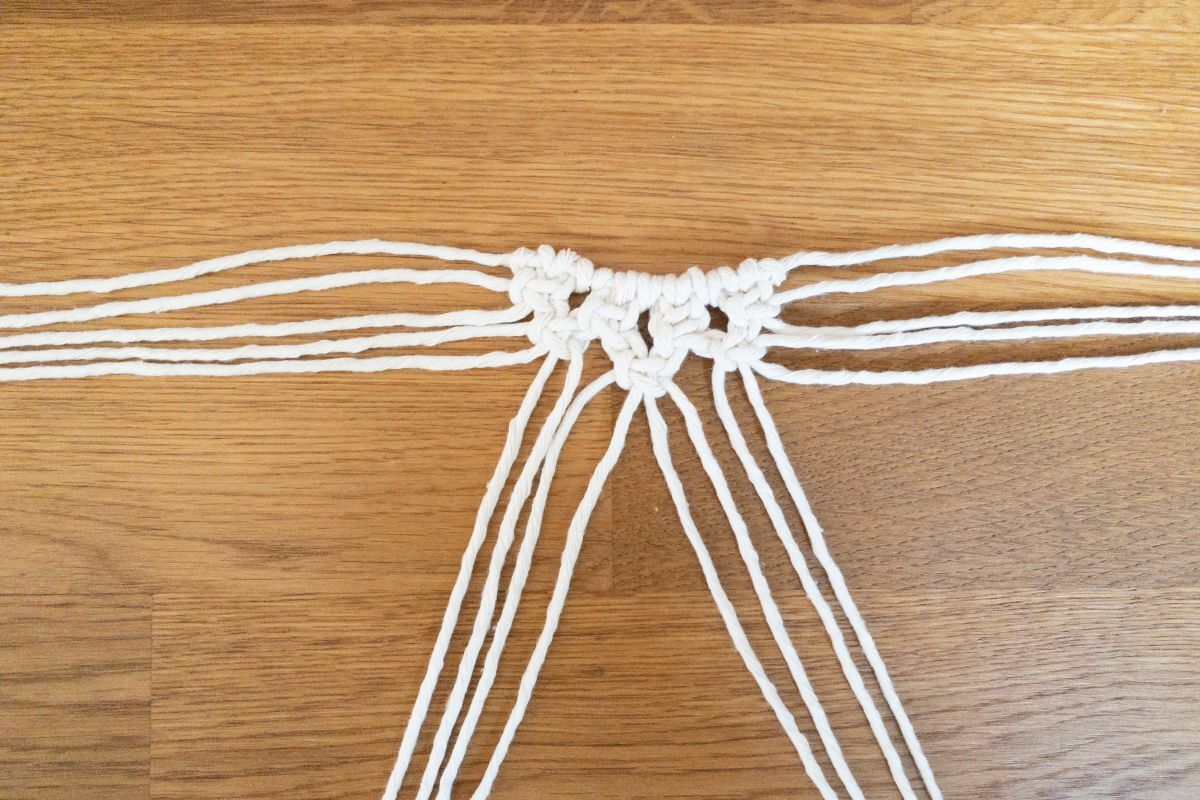
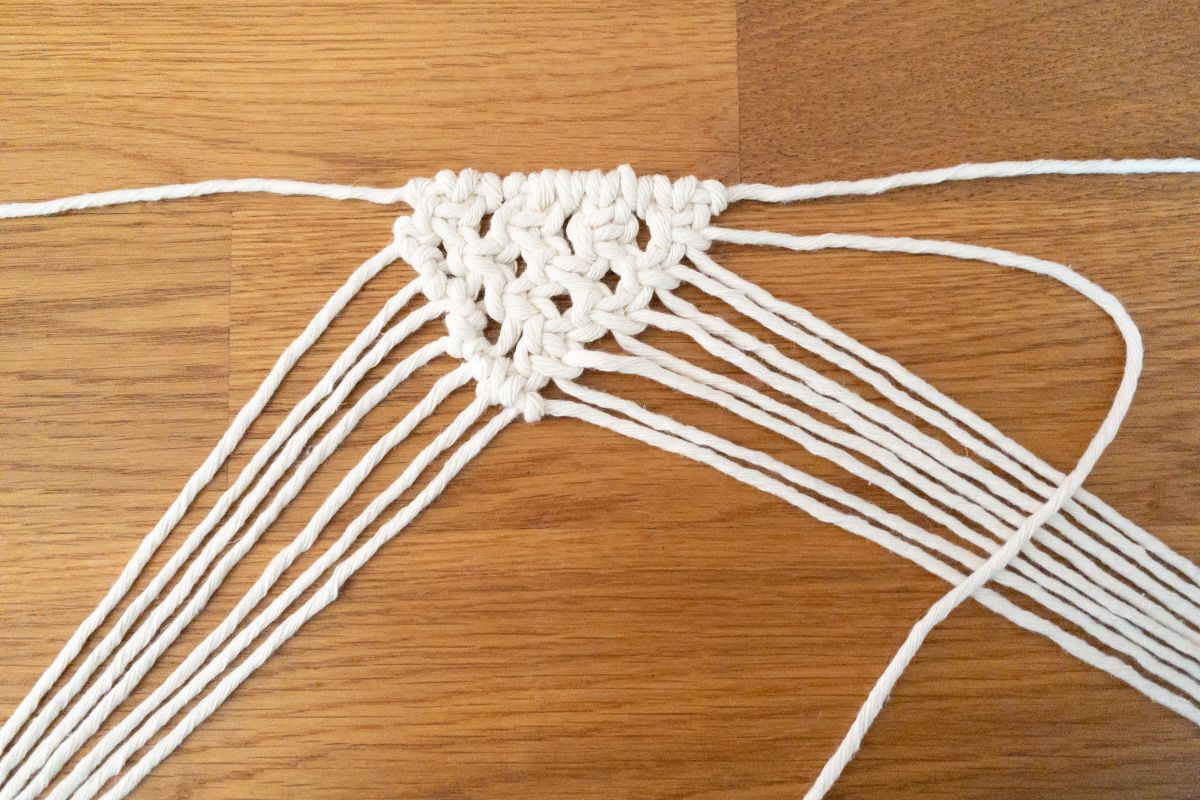
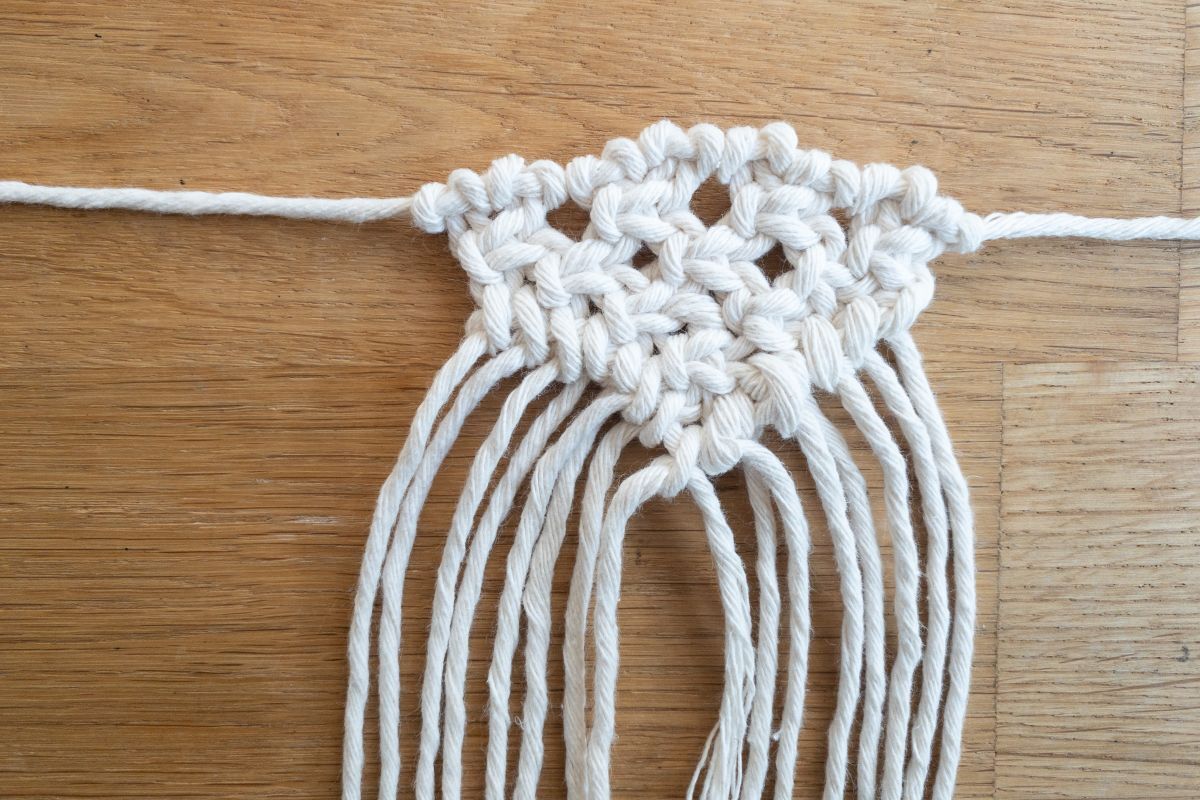
In the next row, you need three square knots. Therefore, leave two threads on each side and tie the three square knots with the remaining twelve threads (Image 11). For the following row, put four threads next to each side and tie two reef knots with the eight threads (Image 12). Finally, put six threads aside on every side and tie the last square knot with the remaining four threads (Image 13). A triangle should now be formed(Image 14).
Step 4: Tie the Macramé rib knot
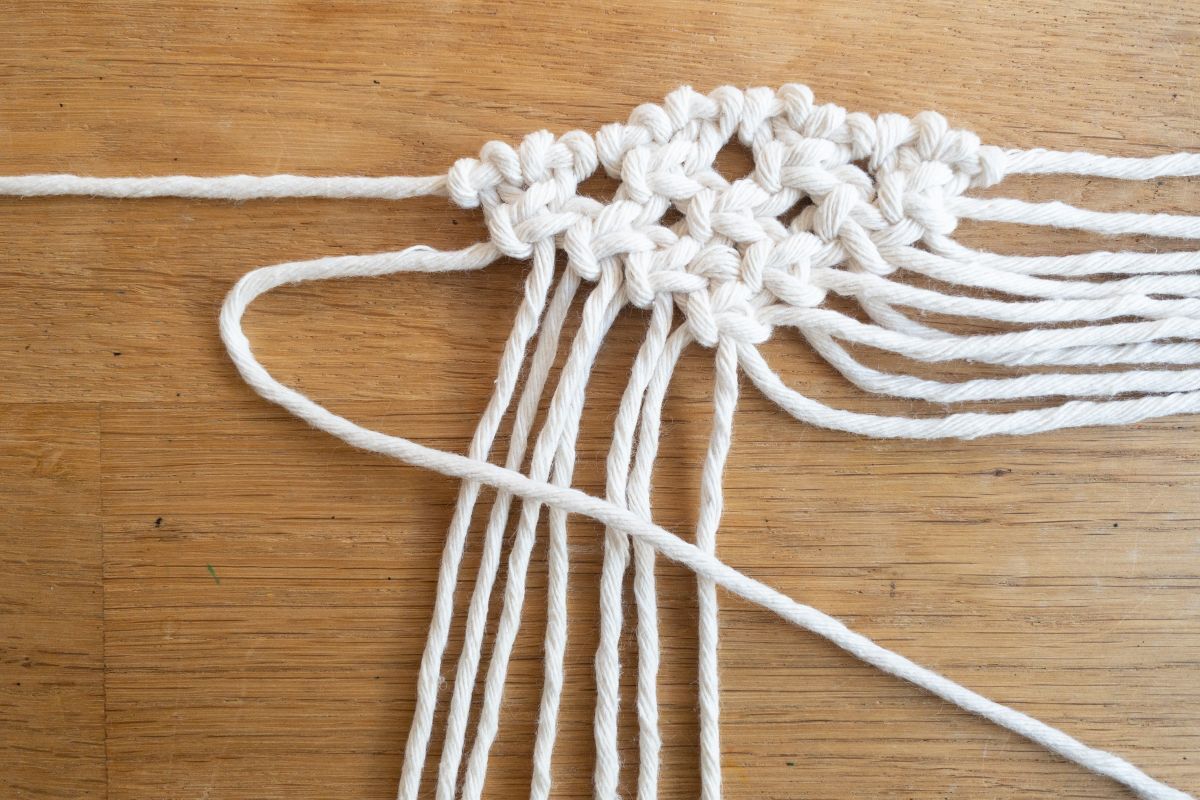
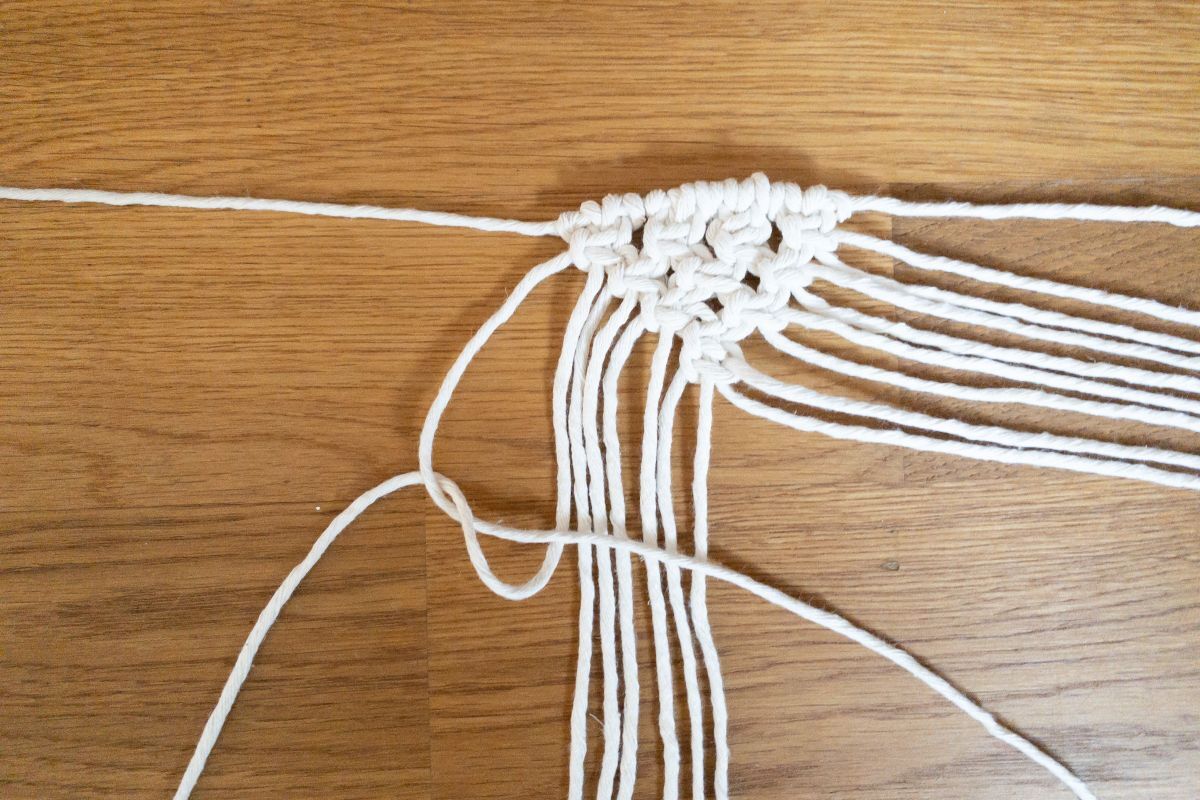
Now the so-called rib knots follow. To do this, divide the 16 threads in half and set aside the eight right threads. Take the left outer strand and cross it diagonally over the other seven strands (Image 15). Now, the second left thread is wrapped around the diagonall thread and pulled tight through the loop (Image 16).
This process is repeated again with the same thread, and you have the first rib knot. Now, tie the rib knots up to the middle thread in the same way with the threads that follow. The diagonal thread actually always stays where it is, and the other threads are wrapped around the diagonally lying thread.
Step 5: Shorten the Macramé threads
Use sharp scissors to cut the threads to the length you want.
Step 6: Untwist and comb out the Macramé threads
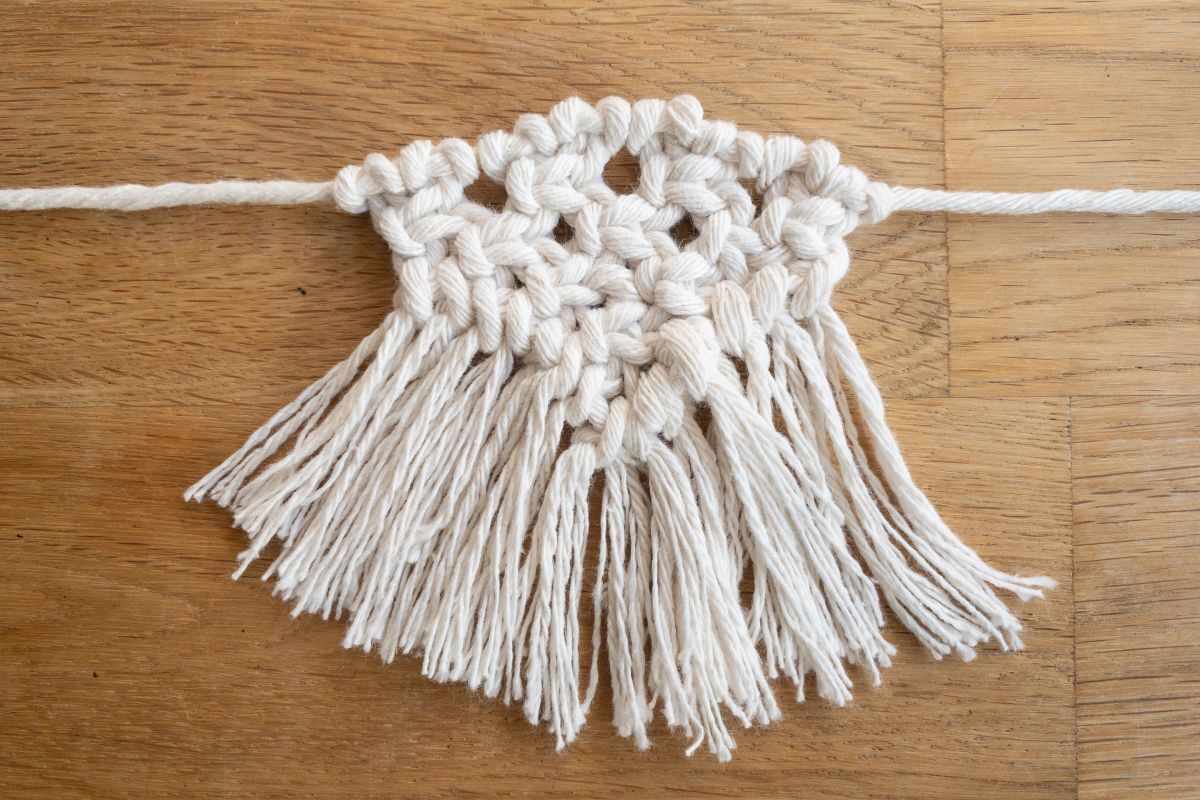
To get pretty threads, you should unravel them and comb them until they are finely separated. This completes the first pennant!
The finished Macramé garland
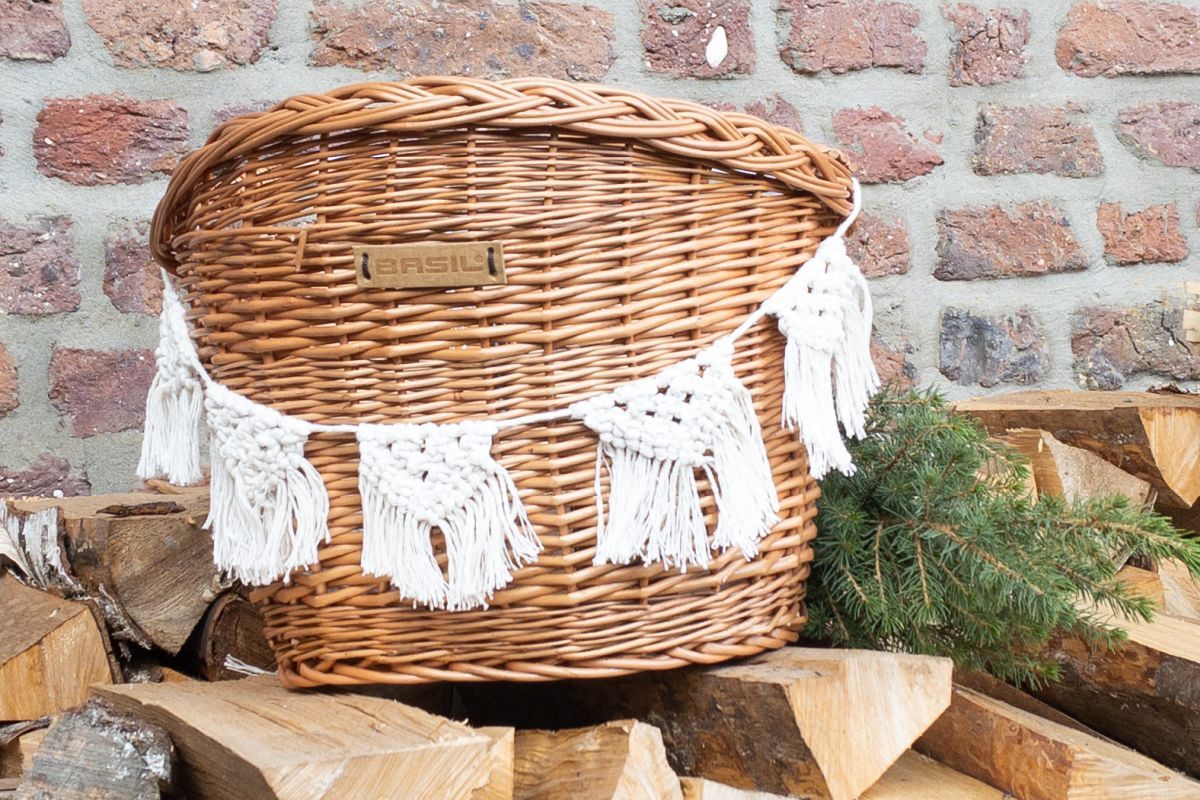
The other four pennants are made using the same principle. In the end, the finished garland should look something like this:
Do you like it as much as we do?
We hope so and wish you lots of fun knotting!

"Pretty, isn't it? By the way, a little tip: The Macramé garland can be carefully hand washed with cold water (30°) and mild soap.”
You must now do the same on the right side with the other eight threads. To do this, again lay the outer right thread diagonally over the other seven threads (Image 17) and tie the rib knots to the middle. Finally, tie the last rib knot with the last thread on the left side. You should now have a nice framed triangle in front of you (Image 18).


